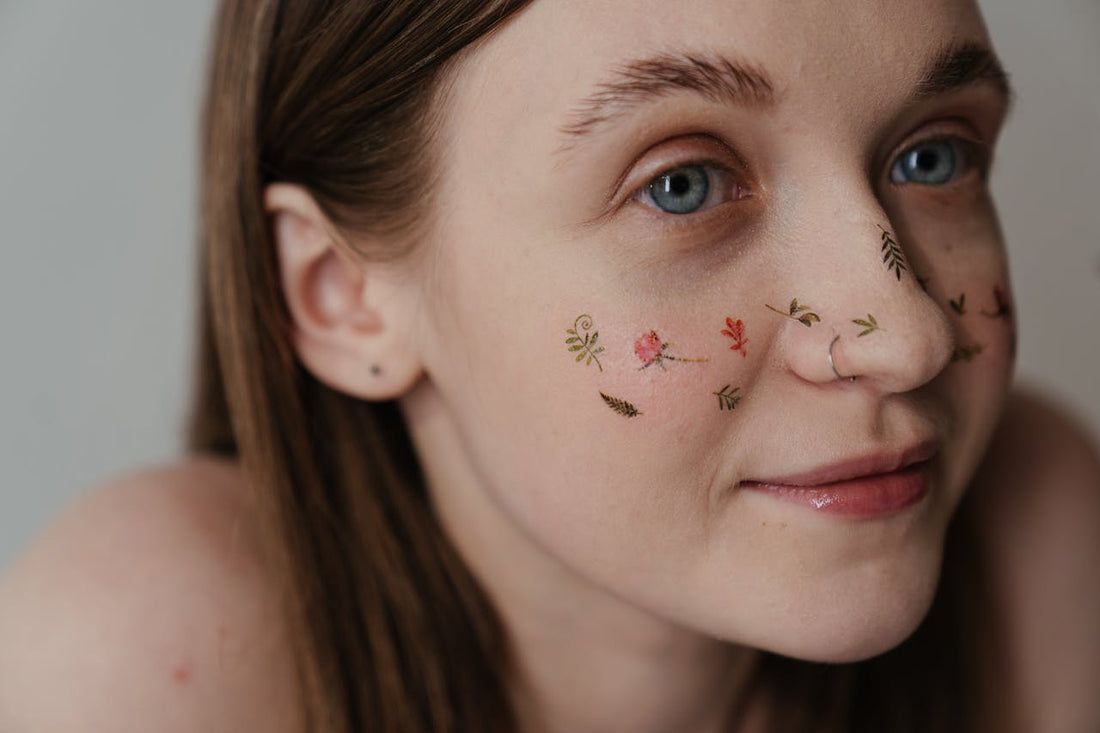
How Are Temporary Tattoos Made?
Whether you're test driving a new design, considering making a permanent one, or just adding some spice for a night out, temporary tattoos can provide you with a layer of colorful body art without the fear of commitment.
But how are they made? From idea to application, temporary tattoos go through careful processing in order to guarantee their beauty as well as their safety.
Let's take a look at how these cool embellishments come to be and how to make them at home.
Tattoo ≠ Drawing

It all starts in the design phase, where artists blend creativity with technical precision to craft designs that translate beautifully onto the skin.
This phase involves selecting the right themes, colors, and sizes, ensuring the designs are not only visually appealing but also suitable for application on various parts of the body.
The final part of the digital preparation process includes mirroring or reversing the design for accurate skin transfer and selecting inks, dyes, and adhesives that are safe and effective for use on the skin.
Once complete, the design is printed onto specialized transfer paper, ready for application.
Here's what you'll learn in this article:
Materials Used in Production
Inks and Dyes

The colors that bring life to temporary tattoos come from inks and dyes specifically formulated for use on the skin. Safety is paramount, so these colorants are usually non-toxic and approved by health regulations, such as the FDA in the United States.
The inks are designed to be hypoallergenic to minimize the risk of skin reactions. They must possess a high degree of purity and consistency to produce clear, vivid colors that mimic the look of a real tattoo.
Transfer Paper

The backbone of a temporary tattoo is the transfer paper onto which the design is printed. This specialized paper is coated with a layer that allows the design to be transferred to the skin with the application of water.
The top layer of the paper, where the design is printed, is treated to hold the ink and ensure it transfers efficiently and cleanly. The quality of the transfer paper directly affects the clarity and longevity of the temporary tattoo on the skin.
Adhesive Layer

A crucial component of the temporary tattoo is the adhesive layer that binds the ink to the skin. This layer must be skin-friendly and strong enough to hold the design in place, yet flexible enough to move with the skin without cracking.
The adhesive is usually a type of acrylic that has been tested for skin compatibility. It's applied in a thin layer over the ink on the transfer paper, playing a vital role in the tattoo's ability to adhere to the skin while being easily removable.
Protective Film

A protective film is often applied over the temporary tattoo on the transfer paper to protect the design until application.
This film is peeled away before the tattoo is applied to the skin, ensuring the design remains pristine and uncontaminated by dirt or oils until it's ready to be transferred.
Alcohol Wipes and Special Treatments

Some temporary tattoo kits come with alcohol wipes to prepare the skin before application, ensuring it's clean and free of oils that could interfere with adhesion.
Additionally, certain temporary tattoos may undergo special treatments to enhance their durability or make them water-resistant, involving proprietary blends of materials that are safe for skin contact.
DIY Temp Tattoos at Home

Creating DIY temporary tattoos at home is a fun and creative way to express yourself without the permanence of traditional tattoos. With a few supplies and some simple steps, you can design and apply your own temporary tattoos. Here’s how you can get started:
Materials You’ll Need
- Inkjet or laser printer
- Temporary tattoo printer paper
- Design software (any basic program where you can create or upload designs)
- Scissors
- Wet cloth or sponge
- Clear adhesive sheet (usually included with tattoo paper)
Step 1: Design Your Tattoo
Step 2: Print and Prepare
Step 3: Cut and Apply
Cut out your tattoo as close to the edges of the design as possible. Peel off the adhesive backing, then place the tattoo face down on your skin where you want it. Dampen the paper backing with a wet cloth or sponge, pressing down firmly. After about 20-30 seconds, or once the paper is thoroughly wet, gently peel off the paper. Your DIY temporary tattoo should now be beautifully adhered to your skin.
Step 4: Care and Removal
To make your temporary tattoo last longer, avoid rubbing it or exposing it to water for too long. When you’re ready to remove it, oil-based products like baby oil or coconut oil will help dissolve the adhesive, allowing you to gently scrub the tattoo away.
Creating DIY temporary tattoos at home is an excellent way for individuals, friends, and families to experiment with body art in a non-permanent, safe manner. Whether for a special occasion, to test a tattoo idea, or just for fun, making your own temporary tattoos offers endless possibilities for artistic expression.
Temporary Tattoos Safety: Ensuring a Safe Experience

Temporary tattoos are widely regarded as a safe alternative to permanent body art, thanks to their non-invasive application and adherence to regulatory safety standards. Made from non-toxic, hypoallergenic materials approved by agencies like the FDA, these tattoos minimize the risk of skin irritation.
The simple application process, requiring just water, avoids the health risks associated with skin punctures, while removal with oil-based products ensures the skin remains unharmed. Despite their general safety, individuals with sensitive skin should conduct patch tests to avoid potential reactions.
It’s crucial to select temporary tattoos from reputable sources, ensuring they meet safety criteria and are transparent about their ingredients, especially when choosing tattoos for children with delicate skin.
How To Apply Temporary Tattoos?
Turn Any Of Our Designs into a Temporary Tattoo
Did you know Tattoos Wizard has a huge catalog of flash designs , ranging from all the different styles and subjects? And the best part is that you can purchase whichever one you like the most as a temporary tattoo .
The temporary tattoos offer a quick and convenient way to express yourself without the commitment for a permanent tattoo or simply to try a design you've been wanting but aren't really sure about it.
What You'll Receive
If you've purchased a design on our website, we'll use that design for your temporary tattoo.
If you already have a tattoo design and you'd like to have it printed and sent to you by us, you can also purchase this product and we'll contact you to receive the design.
Any questions? Contact us at hello@tattooswizard.com
Adding to Cart
You should add one Temporary Tattoo to cart for every design you choose.
If you have more than one design in your cart, we'll contact over email to clarify which design correspond to each temporary tattoo size before printing them.
Sizes
Small : 3x4" | 8x10cm
Medium : 4x6" | 10x15cm
Large : 8x8" | 20x20cm
Application Instructions
1st - Order in Your Desired Size
If you have more than one design in your cart, we'll clarify over email which design corresponds to each size.


2nd - Prepare to Apply
Peel the temporary tattoo and place the sticky surface on your dry skin and wet it with a sponge or tissue for 20 seconds.


3rd - Enjoy for up to 72h
Remove the sticker and dry your skin.
Your new tattoo is ready and you can enjoy it for up to 72 hours.
Beware as it can easily come off if in contact with water during the shower.
To remove : Rub it under running water or apply alcohol.

New Beauty Without Permanent Commitment
Temporary tattoos offer a fantastic opportunity to try out new body art designs without the worry of permanence.
Our vast collection of stunning designs ensures you can freely experiment with temporary ink.
Simply pick an eye-catching design and enjoy its presence. In the worst-case scenario, it all fades away after 72 hours, like magic.

Julian Brzozowski
Julian is naturally artistic and has a passion for tattoos. He specializes in illustration, creating custom designs, flash pieces, and book covers, among other graphic work. He often draws inspiration from nature, incorporating its mystique into his art.


